
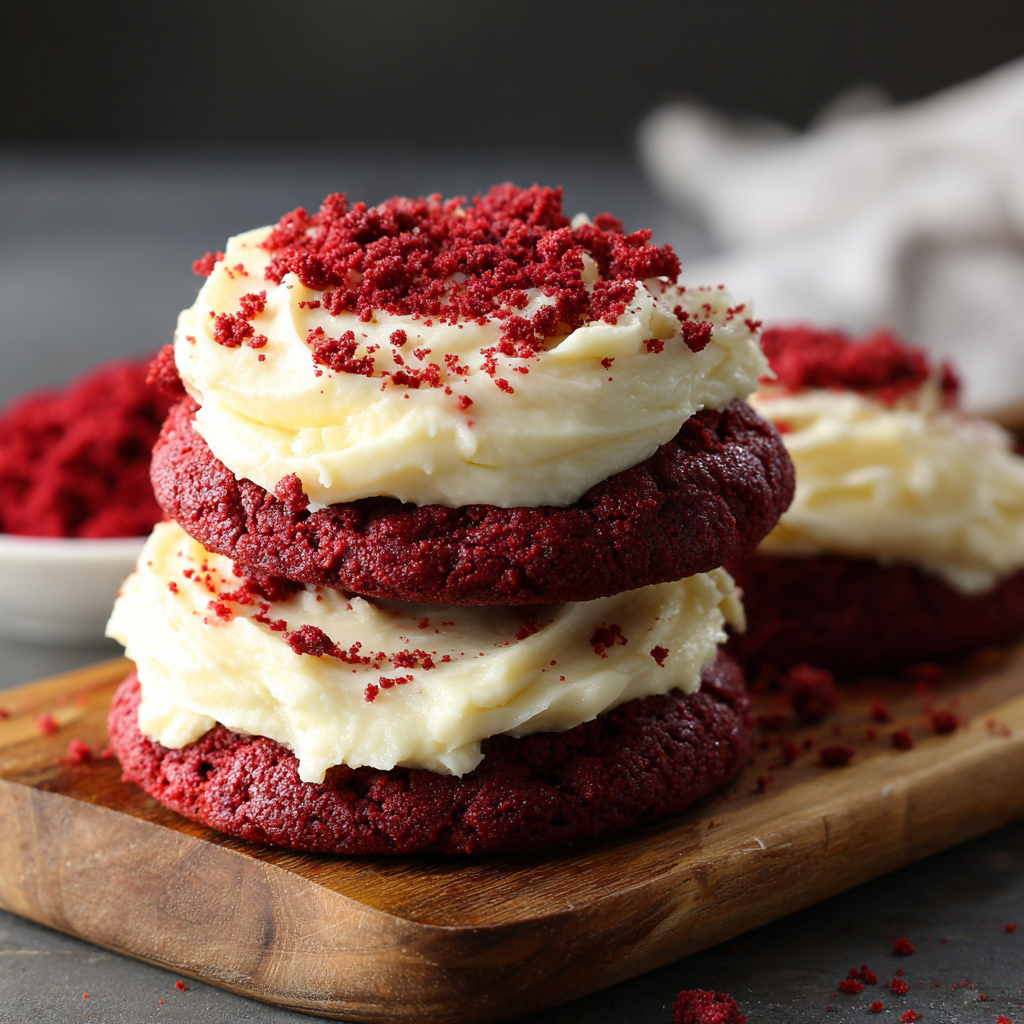
Frosted Red Velvet Cupcake Cookies

A delightful cross between chewy cookies and tender cupcakes: domed red velvet cookie centers topped with silky cream cheese frosting and cookie crumb garnish.
This recipe is a sentimental favorite: a cross between cookies and cupcakes that first appeared in my kitchen during a holiday baking marathon. I wanted something that felt indulgent and elegant but still easy enough to make in a single afternoon. The result is these frosted red velvet cupcake cookies — they puff and dome like mini cupcakes, yet bite into the slightly chewy texture you crave from a cookie. I discovered this method when I adapted a classic cookie dough with light cocoa and a dash of vinegar; the chemistry gives that signature red velvet tang and tender crumb.
I remember serving these at a small winter gathering and watching guests sample one and immediately reach for another. The cream cheese swirl softens the cookie top and adds a silky contrast to the ever-so-slightly crisp edges. The visual appeal — bright ruby centers under a generous frosting swirl — makes them perfect for gifting, cookie exchanges, and holiday platters. They store well and travel beautifully, making them a go-to for last-minute celebrations.
Why You'll Love This Recipe
- Ready in about 50 minutes total, these treats are quick enough for an afternoon project but impressive enough for company.
- Uses pantry staples like all-purpose flour, cocoa, brown sugar, and powdered sugar — no specialty ingredients required.
- Texture balance: domed, tender centers with slightly chewy edges that mimic a cupcake crumb without the paper liner.
- Make-ahead friendly: dough can be refrigerated for a day and frosting firms up in the fridge for piping later.
- Customizable color and garnish: use gel or powdered food coloring and finish with cookie crumbs for a rustic look.
- Crowd-pleaser for holidays, bake sales, and classroom parties — easy to portion and display.
My family’s reaction the first time I made these was immediate: requests for seconds and a few notes on how the frosting recipe made them feel like mini cupcakes. Over time I adjusted the color and cream cheese ratio to reach the silky texture you see here; those small changes made a big difference in mouthfeel and appearance.
Ingredients
- All-purpose flour (1 1/2 cups): Spoon into the measuring cup and level it off. This provides structure without weighing the cookies down. I prefer King Arthur or Gold Medal for consistent results.
- Unsweetened cocoa powder (1/4 cup): Use a natural cocoa for classic red velvet flavor. It contributes subtle chocolate notes and deepens the finished color.
- Instant milk powder (1 tablespoon): Adds richness without extra liquid and helps create a tender crumb; not essential but recommended for depth of flavor.
- Cornstarch (1 tablespoon): Lightens the texture and helps the centers dome while keeping the cookies tender.
- Baking powder & baking soda (1/2 tsp and 1/4 tsp): These leaveners give lift and create the soft, cake-like interior.
- Unsalted butter + vegetable oil (1 stick butter + 3 tbsp oil): The combination of butter and neutral oil yields flavor plus softness; butter provides flavor while oil keeps the interior tender.
- Brown sugar + granulated sugar (1/2 cup each): Brown sugar adds moisture and depth; granulated sugar helps with structure and slight chew.
- Egg, vanilla, white vinegar, and red gel color: The egg binds and tenderizes, vanilla brings warmth, vinegar reacts with baking soda for lift and the red coloring gives the signature hue.
- Cream cheese frosting: Block cream cheese (3 oz) plus 6 tbsp butter, 1 tsp vanilla and 1 1/2 cups powdered sugar — whipped until smooth for a silky finish.
Instructions
Preheat and prepare: Preheat oven to 350°F. Line two large baking sheets with parchment paper and set aside. Confirm oven racks are centered so heat is even; an oven thermometer helps if your oven runs hot or cool. Whisk dry ingredients: In a medium bowl whisk together 1 1/2 cups all-purpose flour, 1/4 cup unsweetened cocoa, 1 tbsp instant milk powder, 1 tbsp cornstarch, 1/2 tsp baking powder, 1/4 tsp baking soda and 1/4 tsp salt. Whisking ensures even distribution of leaveners so domes rise uniformly. Cream fats and sugars: In a large bowl whisk together 1/2 cup (1 stick) softened unsalted butter, 3 tbsp vegetable oil, 1/2 cup packed brown sugar and 1/2 cup granulated sugar until smooth. This step incorporates air and dissolves the sugars, which affects tenderness and spread. Mix wet additions and color: Whisk in 1 large room-temperature egg and 1 tsp pure vanilla. Add 1 tsp white vinegar and 1–2 tsp red gel food coloring until you reach the desired shade; the color will look brighter before the dry ingredients are folded in. Combine to form dough: Fold the dry ingredients into the wet mixture with a spatula until a thick, sticky dough forms. The dough may be tacky; chilling for 10 minutes can help if it’s too soft to scoop cleanly. Scoop and bake: Use a large cookie scoop (3–4 tablespoons) to portion dough about 3 inches apart on the lined sheets. Bake in the center of the preheated 350°F oven 12–15 minutes, until puffed and just starting to show a very light golden color at the bases. Avoid overbaking to preserve softness. Cool and finish: Cool cookies on the baking sheet for about 5 minutes, then transfer to a wire rack to cool completely. Make the frosting by beating 3 oz block cream cheese with 6 tbsp butter until smooth, then add 1 tsp vanilla and 1 1/2 cups powdered sugar; chill briefly if too soft. Pipe or spread onto cooled cookies and garnish with cookie crumbs from any misshapen portions.
You Must Know
- These keep in an airtight container at room temperature for 2 days and refrigerated for up to 4 days; freeze unfrosted baked cookies for 2 months.
- High in sugar and dairy; each cookie is an indulgent treat — approximate calorie count is listed below for planning.
- Use gel or powdered food coloring to avoid extra liquid; liquid dyes may alter dough hydration and spread.
- Cookies dome while baking because cornstarch and baking powder create a tender crumb that traps steam.
My favorite part is seeing the frosting swirl come together — a quick pipe transforms the rustic dome into something that looks bakery-made. Guests often assume I spent hours decorating, when the secret is simply chilled frosting and a steady hand.

Storage Tips
Store baked and frosted cookies in a single layer or separated by parchment paper in an airtight container in the refrigerator for up to 4 days. For room-temperature storage, keep unfrosted cookies in an airtight container at room temperature for 48 hours to maintain texture. To freeze, flash-freeze a single layer of unfrosted cookies on a baking sheet for 1 hour, then transfer to freezer-safe bags for up to 2 months. Thaw in the refrigerator overnight and frost when ready to serve.
Ingredient Substitutions
If you don’t have instant milk powder, substitute with an extra tablespoon of flour and a splash more butter for richness, though the texture will be slightly different. Swap vegetable oil with light olive oil or melted coconut oil, noting coconut will add a hint of flavor. For the color, use powdered or gel food coloring; avoid liquid dye to prevent additional moisture. To make these egg-free, try a commercial egg replacer or 1/4 cup applesauce per egg and expect a slightly softer interior.
Serving Suggestions
Plate these on a tiered cookie stand for parties, garnish with a small edible flower or colored sugar for festive events. They pair beautifully with espresso, milk, or a lightly sweet hot cocoa. For a holiday platter, alternate with peppermint bark or shortbread to provide textural contrast. A small spoonful of raspberry jam under the frosting can add a bright tart note if you enjoy fruity contrasts.
Cultural Background
Red velvet has roots in early 20th-century America, often associated with Southern baking and signature desserts like layer cakes. The distinctive color and tang come from a combination of cocoa, buttermilk or vinegar, and sometimes food coloring. Turning that flavor profile into a domed cookie merges two traditions — the beloved American cookie and the classic red velvet celebration cake — creating a portable, shareable treat that’s become popular at modern gatherings.
Seasonal Adaptations
In winter, use deeper red hues and dust frosting with edible gold shimmer for special occasions. For Valentine’s Day, pipe small rosettes and top with freeze-dried strawberry crumbs. In warmer months, reduce the frosting slightly to prevent melting and pair with bright citrus-flavored garnishes to cut the richness. Swap powdered sugar in frosting for a touch less and a teaspoon of lemon juice for a tangy lift in summer.
Meal Prep Tips
Double the batch and freeze half the baked cookies unfrosted for quick dessert options. Prepare frosting ahead and refrigerate in an airtight container for up to 3 days; bring to room temperature and whip briefly before piping. Portion dough onto a tray and freeze scoops, then transfer to a bag — bake directly from frozen, adding 1–2 minutes to the bake time.
These little domes are a celebration in every bite — bright, tender, and topped with indulgent frosting. Share them, gift them, or keep them all to yourself; they always spark a smile.
Pro Tips
Use gel or powdered color to avoid excess moisture from liquid dyes.
Chill frosting briefly if too soft to pipe; a firmer frosting creates clean swirls.
Scoop dough with a 3–4 tablespoon scoop to get uniform domes and consistent bake times.
This nourishing frosted red velvet cupcake cookies recipe is sure to be a staple in your kitchen. Enjoy every moist, high protein slice — it is perfect for breakfast or as a wholesome snack any time.
FAQs about Recipes
How long do these keep after frosting?
Yes. Frosted cookies keep best refrigerated for up to 4 days in an airtight container. Bring to room temperature before serving for best texture.
Can I freeze these?
Yes. Freeze unfrosted baked cookies for up to 2 months. Thaw overnight in the refrigerator and frost when ready to serve.
Tags
Frosted Red Velvet Cupcake Cookies
This Frosted Red Velvet Cupcake Cookies recipe makes perfectly juicy, tender, and flavorful steak every time! Serve with potatoes and a side salad for an unforgettable dinner in under 30 minutes.
Ingredients
Red Velvet Cookies
Cream Cheese Frosting
Instructions
Preheat and line pans
Preheat oven to 350°F and line two large baking sheets with parchment paper. Position oven racks in the center for even baking.
Combine dry ingredients
Whisk flour, cocoa, milk powder, cornstarch, baking powder, baking soda, and salt in a medium bowl until evenly mixed.
Cream fats and sugars
Whisk together softened butter, oil, brown sugar and granulated sugar until smooth and slightly aerated to promote a tender texture.
Add wet ingredients and color
Whisk in the egg and vanilla, then add vinegar and 1–2 tsp gel food coloring until bright. Color will mellow after dry ingredients are folded in.
Fold and scoop
Fold dry ingredients into wet mixture until you have a thick, sticky dough. Use a 3–4 tbsp cookie scoop to portion dough onto prepared sheets, leaving about 3 inches between cookies.
Bake and cool
Bake 12–15 minutes at 350°F until puffed and bases show a light golden edge. Cool on sheet 5 minutes, then transfer to a wire rack to cool completely before frosting.
Make and apply frosting
Beat cream cheese and butter until lump-free, add vanilla and powdered sugar and mix until smooth. Chill if necessary, then pipe or spread onto cooled cookies and garnish with crumbs.
Last Step: Please leave a rating and comment letting us know how you liked this recipe! This helps our business to thrive and continue providing free, high-quality recipes for you.
Nutrition
Did You Make This?
Leave a comment & rating below or tag
@kitchenfunwithmy3sons on social media!
Categories:
You might also like...

3 Ingredient Cottage Cheese Egg Muffins for a Fluffy Breakfast
Simple, protein packed muffins made with eggs, cottage cheese, and a pinch of salt. Keto friendly and ready in under 35 minutes for busy mornings.
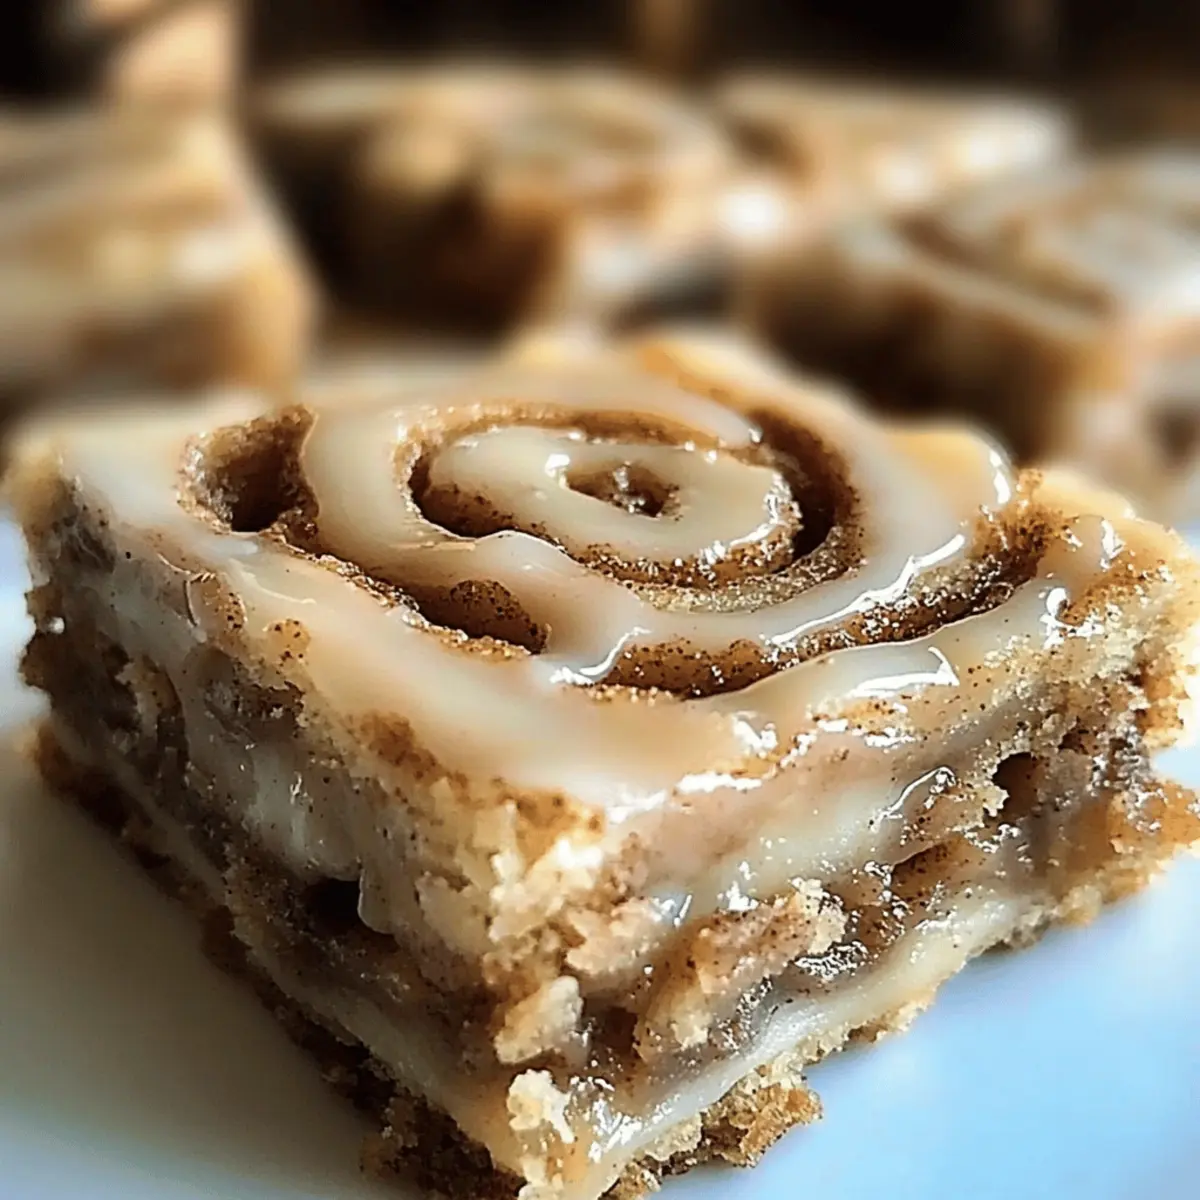
Cinnamon Roll Bliss Bars: Easy Bars for Sweet Moments
A fast and comforting twist on the classic cinnamon roll, these bars are sticky, tender, and glazed to perfection. Ready in under an hour and perfect for sharing.
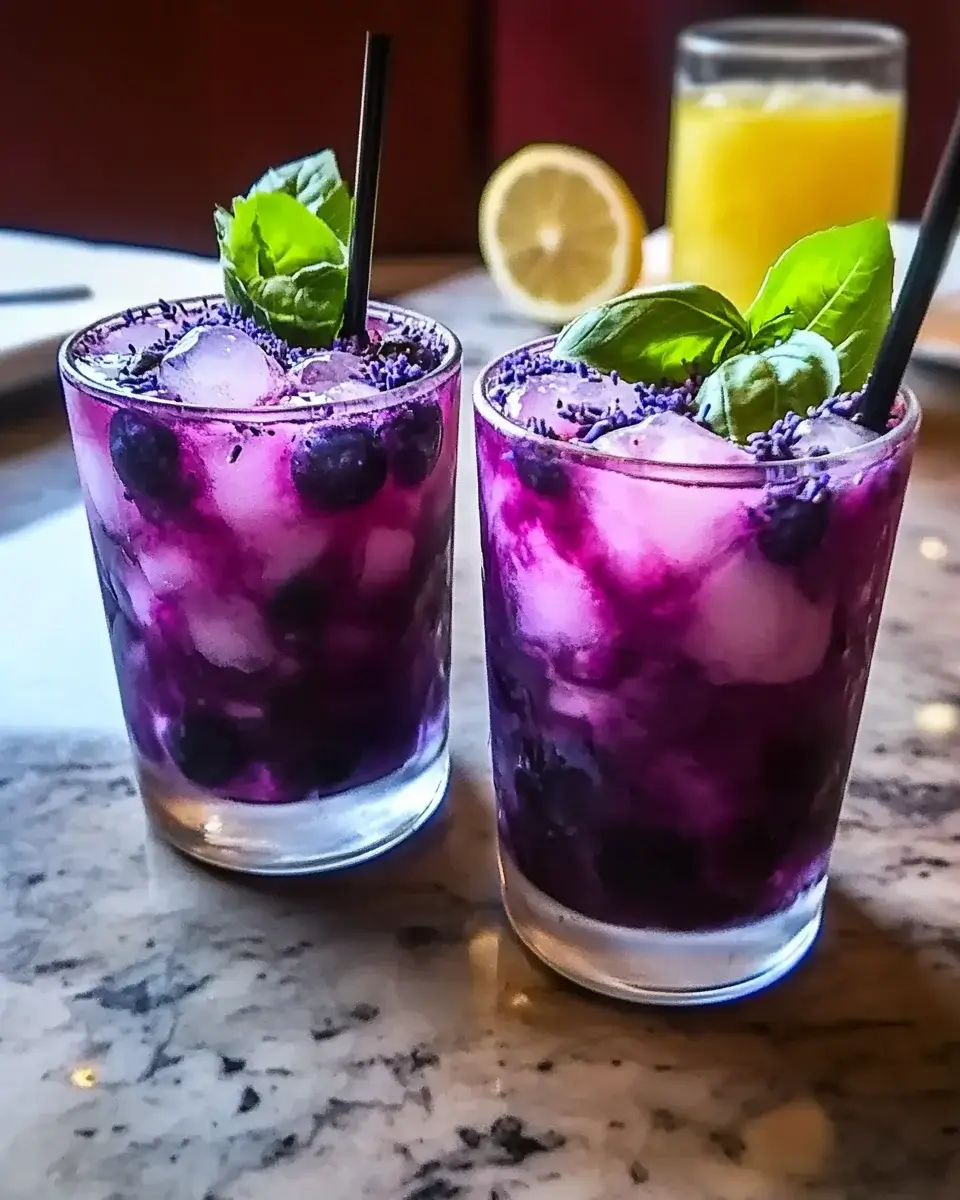
Blueberry Basil Lemon Lavender Mocktail
A bright, aromatic mocktail that blends fresh blueberries, fragrant basil, zesty lemon, and floral lavender syrup for a refreshing drink perfect for warm days.
Did You Make This?
Leave a comment & rating below or tag @kitchenfunwithmysons on social media!
Rate This Recipe
Share This Recipe
Enjoyed this recipe? Share it with friends and family, and don't forget to leave a review!
Comments (1)
This recipe looks amazing! Can't wait to try it.
Comments are stored locally in your browser. Server comments are displayed alongside your local comments.
Hi, I'm Emily!
What's Popular

Get My 30-Minute Meals email series!
Quick and easy dinner ideas delivered to your inbox.